|
Managing webmail can prove to be a challenge in our busy society. We are often bombarded with impersonal messages that are the result of being an address on a large distribution list or the target of a marketing campaign. What can be done to manage the sheer volume of incoming webmail we receive?
Webmail Filters are the perfect solution for managing our incoming and outgoing mail.
Fortunately, setting up webmail filters is a fairly simple process. By capitalizing on the intuitive and efficient nature of our webmail service, you can easily set up filters to manage incoming and outgoing email messages, including calendar-related messages and Activity Streams. A filter consists of one or more conditions and one or more actions. You can base a condition on a subject, email messages from a specific person, or messages for a particular date. If the message matches the conditions, a specified action of your choosing is performed.
You can create filters to do the following:
-
Sort incoming messages into folders. For example, all email messages from a particular individual are automatically moved into a specified folder upon receipt.
-
Tag messages. Email messages regarding a particular event are marked with the 'Events' tag, for example.
-
Forward or discard email. For example, all email messages received from a particular email address are moved to the Trash folder.
-
Flag messages for importance.
Please Note: Filters are applied in the order that they are listed. You can change the order at any time.
We have included step-by-step instructions below on tackling the most common webmail filtering features. Please see Most Common Filtering Tasks listed directly to the right. Click on a feature description (e.g., Apply a Filter to Email Messages) and it will allow you to jump to specific instructions below. Then, click the browser back button to return to the top of the page.

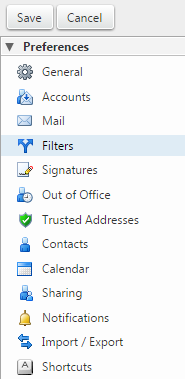
Step 1. Select Preferences from the top menu bar. Then select Filters from the drop-down menu that appears.

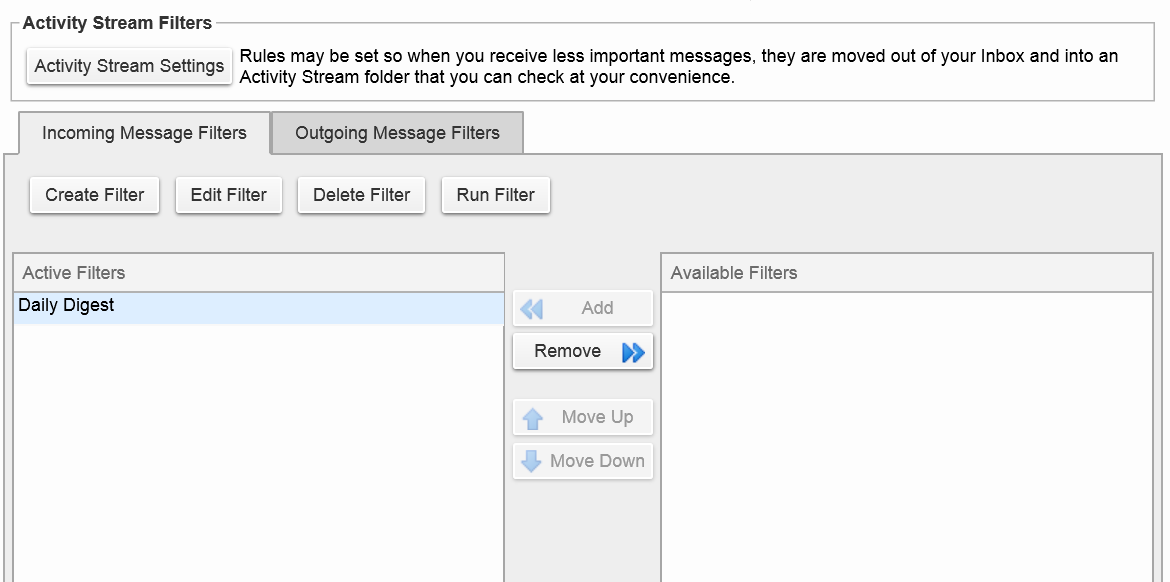
Step 2. Click either Incoming Message Filters or Outgoing Message Filters
Step 3. Select Create Filter
Step 4. In the Add Filter text box, enter a unique name for the filter
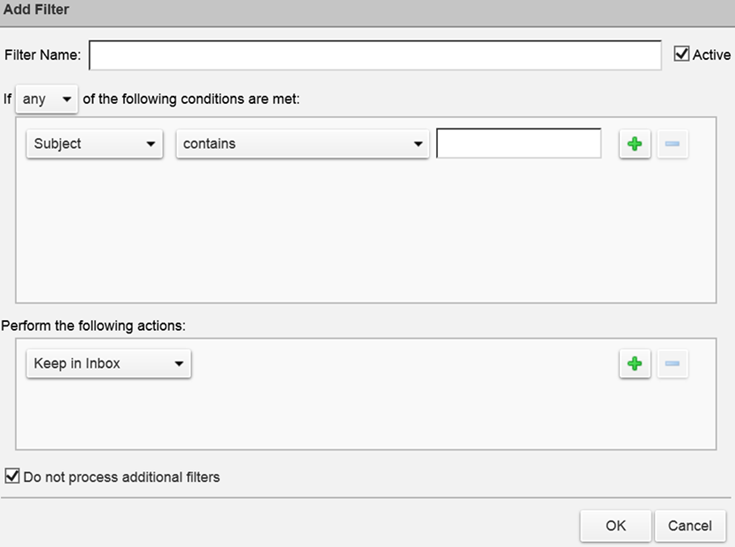
Step 5. To make the filter active, check the Active box in the upper right corner
Step 6. Choose whether the message must meet any or all of the listed conditions
Step 7. From the drop-down menu, select which part of the message to apply to the filter, such as Subject or Date
Step 8. Choose how the item must match, such as contains or does not contain
Step 9. Enter or select the information to compare against, such as the date, email address, or phrase. Conditions are not case-sensitive.
Step 10. To add more conditions, click the + button and repeat the above steps. The order of the conditions does not matter.
Step 11. Under Perform the following actions, choose an action from the drop-down menu, such as Move into folder. Depending on the action that you choose, you might need to browse to locate a folder or tag name, or enter an email address to redirect a message.
Step 12. To add more actions, click the + button and repeat the above step. The actions are applied in the order in which they are listed.
Step 13. If you want more than one filter to be applied to a message, uncheck Do not process additional filters
Step 14. When you are done creating the filter, click OK
Please Note: An email message is evaluated by each active filter, unless you specify that a message is treated only by the first filter that it matches. Usually, you do not want more than one filter applied to a message after the first match because the message can undergo multiple, perhaps contradictory, actions.
Once the filter information is extracted from the message, you can modify the conditions and actions.
Step 1. Right-click on an email message and choose Create Filter
Step 2. The Add Filter dialog box appears populated with the information from the email message
Step 3. In the Filter Name text box, type a unique name for the filter
Step 4. Change the conditions and actions as necessary using the drop-down menus
Step 5. Click OK
Using a filter is a quick way to organize email by moving messages into folders.
Step 1. Go to the Preferences > Filters page
Step 2. Click Run Filter
Step 3. Select the folders to which to apply the filter
Step 4. Click OK. A Filter run complete message displays when finished.
Step 1. Go to the Preferences > Filters page
Step 2. Click either Incoming Message Filters or Outgoing Message Filters
Step 3. Select Create Filter
Step 4. In the Filter Name text box, enter a unique name for the filter
Step 5. To make the filter active, check the Active box in the upper right corner
Step 6. In the Subject drop-down menu, select Calendar
Step 7. Select an invite as a replied / not replied or requested / not requested condition from the drop-down menu
Step 8. To add more conditions, click the + button and repeat the above steps
Step 9. The order of the conditions does not matter
Step 10. Under Perform the following actions, choose an action from the drop-down menu
Step 11. Depending on the action that you choose, you might need to browse to locate a folder or tag name
Step 12. To add more actions, click the + button and repeat the above step. The actions are applied in the order in which they are listed.
Step 13. If you want more than one filter to be applied to a message, uncheck Do not process additional filters
Step 14. Click OK
You can set rules using the Activity Stream filter to move email messages out of your Inbox and into an Activity Stream folder. This allows you to read the filtered email messages at your convenience. For example, you might want to automatically filter the following types of messages into the Activity Stream folder:
-
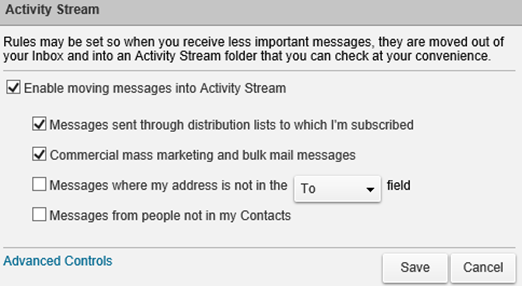
Messages sent through distribution lists to which you are subscribed
-
Commercial mass marketing and bulk mail messages
-
Messages where your address is not in the To or Cc field
-
Messages from people not in your address book
Step 1. Go to the Preferences > Filters page
Step 2. Click Activity Stream Settings

Step 3. Select Enable moving messages into Activity Stream
Step 4. Select the rules you want to apply and click Save
Step 5. To configure a more detailed filter, click Advanced Controls
Step 6. Click OK. The Activity Stream filter displays in your Active Filters list.
|