Sharing Account Items
|
The webmail Sharing feature lets you give others access to items in your account. You specify which items to share and the level of access. You invite a user to share, and the user can accept or decline the invitation. The Sharing page under Preferences helps you manage your shared items. This page shows the folders you shared with others and folders that are shared with you. You can share your items with specific internal and external users or make an item public. External and public users can only view content - they cannot make changes. When you share an item with internal users, you determine the type of access privileges to give the user. You can set permissions per user or group. You can edit the access rights and revoke permissions at any time. You assign internal users or groups privileges using roles. The user or group must have a valid address in your organization’s mail server.
Please Note: You can share any of your mail folders, calendars, address books and task lists except the Trash and Junk folders.
We have included step-by-step instructions below on tackling the most common Item Sharing tasks (see them listed directly to the right). Click on a task description (e.g., Sharing a Folder) and it will allow you to jump to specific instructions below. Then, click the browser back button to return to the top of the page. 
How to Share a FolderYou can share any of your mail folders, including your Inbox folder, with internal and external users. Users that you share with can see the content of the folder but the information is not saved to their mailboxes. Users that have the manager role have full permission to view and edit the contents of the shared mail folder, create new sub-folders, send email on your behalf, and delete email messages. Users with the admin role have full permission to view, edit the content of the mail folder, create new sub-folders, send email on your behalf, delete email messages, and share your mail folder with others. Copies of the messages the user sends on your behalf are saved in your mailbox, and if the user deletes something from your mailbox or marks it as spam, the message is moved to your Trash folder or Junk folder. If the user has access to more than one of your folders, the user can:
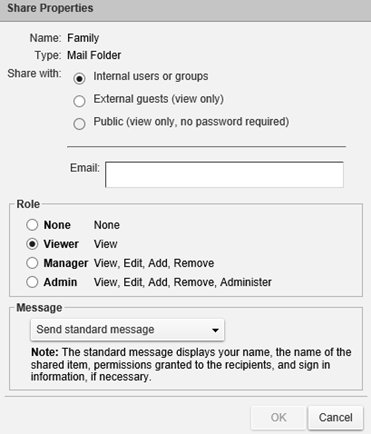
You can share your mail folders, address books, calendars, and task lists folders. You invite a user to share, and the user can accept or decline the invitation. Step 1. Right-click on the folder that you want to share Step 2. Click Share Folder Step 3. In the Shared Properties dialog box, select whether you want to share with internal, external, or public users: • For Internal users or groups, enter the user’s email addresses. In the Role area, select the access privileges. • For External guests, enter user’s email addresses. External guests are sent an email with a link to the shared item. They create a display name and password the first time they go to view the shared item. Step 4. In the Message area, select which type of message to send to those to whom you are granting access. This message can be sent to internal users and external guests. Please Note: If you selected Public, you must notify the public of the URL. Step 5. Click OK. If the user accepts the invitation to share the folder, a copy of the folder is put in the user’s accountHow to Change User Access to a Shared FolderYou can change the Sharing privileges that you have assigned to a user or group. Step 1. Right-click on the shared folder to change and select Edit Properties. The Folder Properties dialog box displays the names that share the folder. 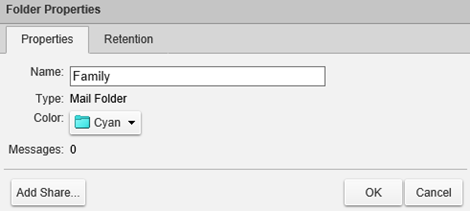
Step 3. In the Share Properties dialog box, change the privileges. You can temporarily disable access to a shared folder without revoking the share privileges by selecting None. Step 4. Choose whether you want to inform the user via email. Step 5. Click OK.How to Remove User Access to a Shared FolderStep 1. Right-click the shared folder and select Edit Properties. The Folder Properties dialog box displays the names that share the folder. Step 2. Click Revoke next to the user name that is being removed. Step 3. In the Revoke Share dialog box select whether to send a standard message or to add a note to your message. Step 4. Click Yes. The user can no longer access your folder.How to Accept an Invitation to Share ItemsIf you receive an email notice that you have been granted access to share another person's mail folder, you can accept or decline the share. If you accept, the shared folder displays in the specified application’s list in the overview pane. This information is not actually saved in your mailbox. Step 1. To accept the invitation, click Accept Share Step 2. In the Accept Share dialog box, you can change the folder name and select a color to highlight the folder Step 3. Choose whether to send a confirmation to the person who sent the invitation Step 4. Click Yes. The folder is added to your overview pane, and the message is moved to your Trash folder.How to Find Items Shared With YouSometimes you might not get an email notification that an item is shared with you, or your organization might have shared items with the public that you would like to find. The Find Shares link helps you find items that can be shared with you. The Find Shares link is at the bottom of the Folders section in the overview pane. Step 1. Click Find Shares 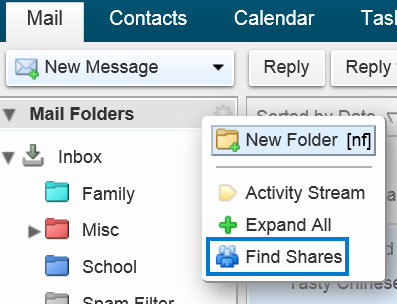 Step 2. In the Add Shared Folder dialog box, select the item shared with you that you have not accepted, or in the Finds Shares text box, enter an email address to see if an item was shared with you from that address. 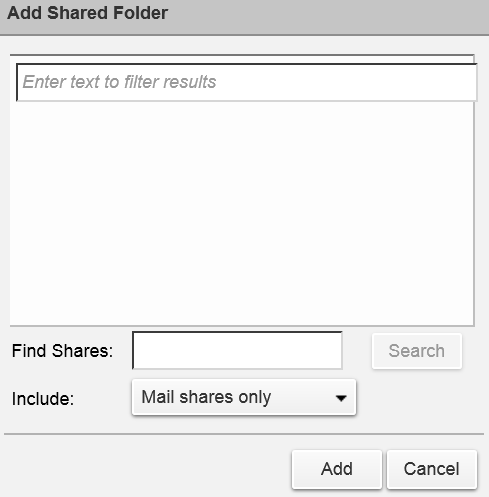 Step 3. In the Include drop-down menu, select which application to search. Select All Applications to search all applications for items shared with you. Step 4. Click Search Step 5. Select the items you want to accept Step 6. Click AddHow to Manage Your Shared ItemsThe Preferences > Sharing page shows items that are shared with you and items that are shared by you. You can also find items that have been shared with you, but you have not yet accepted. This page is organized into the following sections:
Step 1. Go to the Preferences > Sharing page 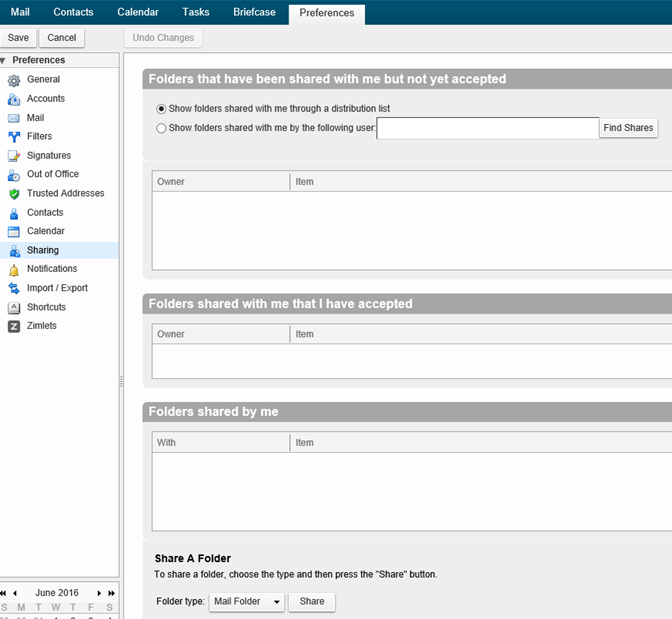
Step 3. Click Share Step 4. Select the folder to share and click OK Step 5. In the Shared Properties dialog box, select whether you want to share with internal, external, or public users Step 6. Depending on with whom you share, do the following: • For internal users or groups, enter the user’s email addresses. In the Role area, select the access privileges. • For External guests, enter user’s email addresses. External guests are sent an email message with a link to the shared item. They create a display name and password the first time they view the shared item. • For the Public, enter the URL to use. In the Message area, select which type of message to send to those who you are granting access. This message can be sent to internal users and external guests. Please Note: If you select Public, you must notify the public of the URL. Step 7. Click OK |
|