This guide will help you set up your Thunderbird email program to receive and send email using your new advanced account settings.
Step 1. Navigate to your Account Settings
-
Open Thunderbird
-
Select your @logantele.com email address in the left column
-
Click View settings for this account
-
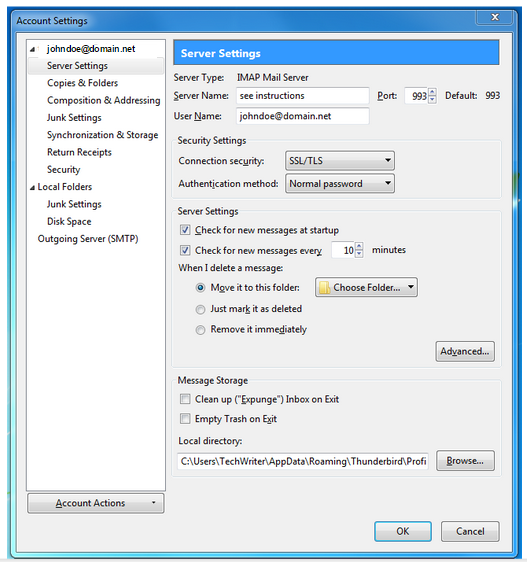
Click Server Settings
Step 2. Update your Incoming Server Settings (from the Account Settings screen):
-
Edit the Server Name to: mail.logantele.com
-
Enter your full email address (ex: myemail@logantele.com) into the User Name field
-
Select the Connection security drop-down and choose SSL/TSL (Accept all certificates)
-
Select the Authentication method drop-down and choose Normal password
-
Ensure that the Port field is displaying 995 for POP or 993 for IMAP
Step 3. Update your Outgoing Server Settings:
-
Select Outgoing Server (SMTP) in the column on the left
-
Click your email address (located toward the top center of the screen) so that it highlights
-
Click Edit
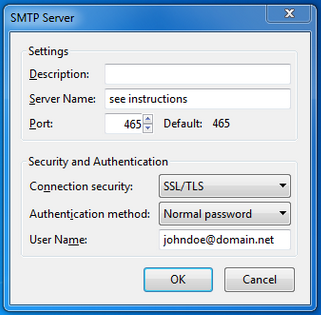
Step 4. Update your SMTP Server settings:
-
Description is an optional field
-
Enter the Server Name as: mail.logantele.com
-
Change the Port field to 465
-
Select the Connection security drop-down and choose SSL/TSL (Accept all certificates)
-
Select the Authentication method drop-down and choose Normal password
-
Enter your full email address (ex: myemail@logantele.com) in the User Name field
-
Click OK
Congratulations, your Thunderbird email is now set up!