Updating Email Server Settings/Passwords in Outlook 2019
This guide will help you update Outlook 2019 to receive and send email using your new account settings.
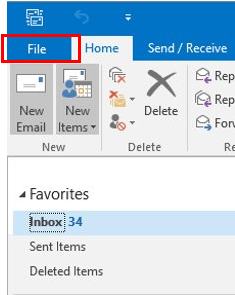
Step 1. Navigate to your Account Settings
- Open Outlook 2019
- Select File in the top left
- Select Account Settings
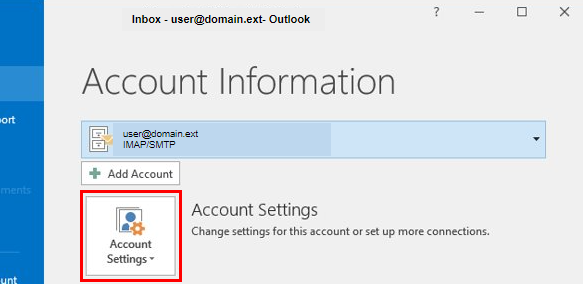
- From the dropdown, select Account Settings...
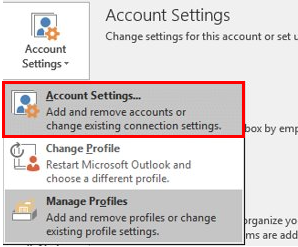
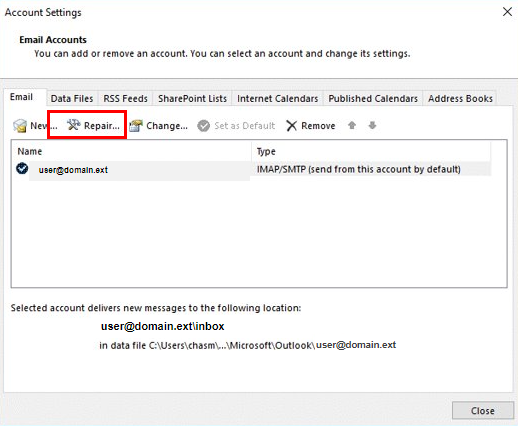
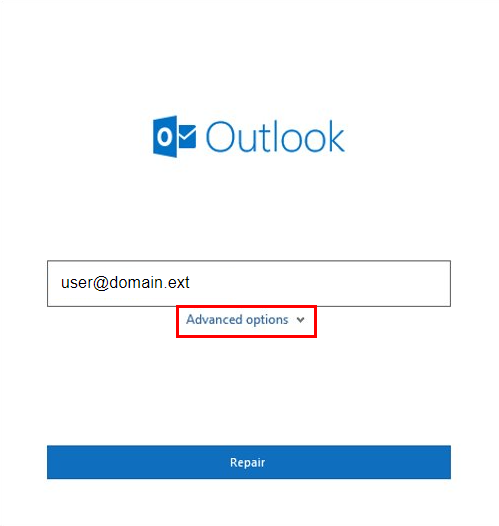
- Select Repair
- Select Advanced Options
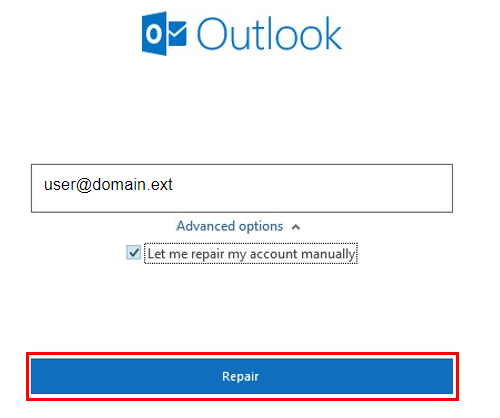
- Make sure the box is checked to "Let me repair my account manually". Then select Repair
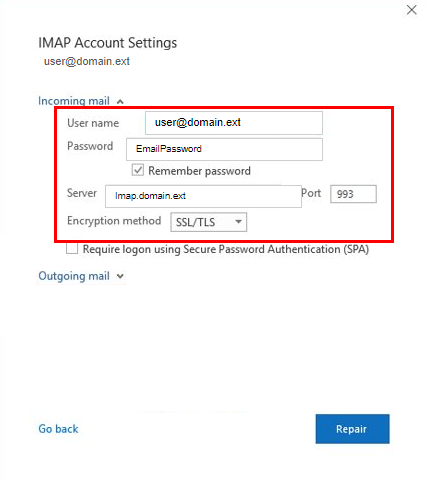
- Verify/edit your incoming email password and/or server settings here
- User name: your full @mygsc.com email address
- Password: Email Password
- Server: mail.mygsc.com
- Port: 993
- Encryption Method: SSL
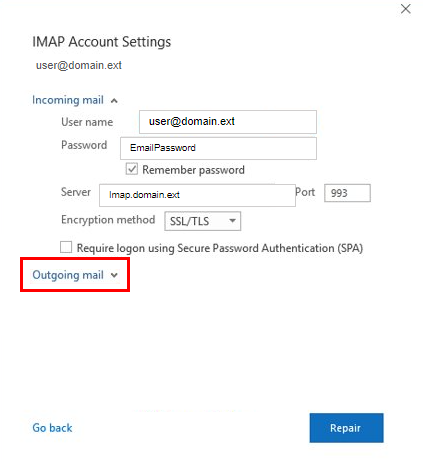
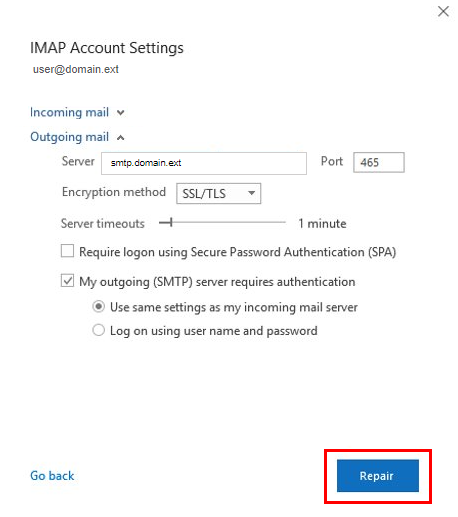
- Select Outgoing Mail
- Verify/edit your outgoing email password and/or server settings here
- Server: smtp.mygsc.com
- Port: 465 or 587
- Encryption Method: SSL
- Ensure the box is checked for authentication and choose- "Use same settings as my incoming mail server"

- Select Repair
- Select Done
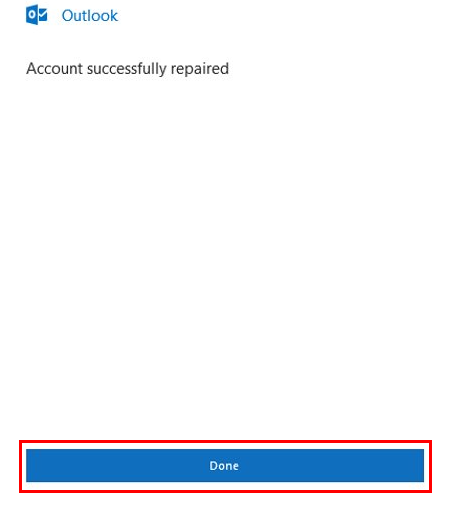
Congratulations, your Outlook 2019 email is now updated!