Updating Email Passwords in your ios17 or 18 Device
This easy guide will help you update your email password and/or settings on your iOS device.
Step 1. Locate your email settings:
-
On your iPhone or iPad, open Settings (typically on your homescreen)
-
Tap the Search box
-
Type “Mail” into the search box, then tap the search result that says Mail (Apps)
-
Alternatively, from the Settings main screen, you can scroll down, Tap Apps, and then scroll until you find Mail; however, this method is faster and more efficient.
-
-
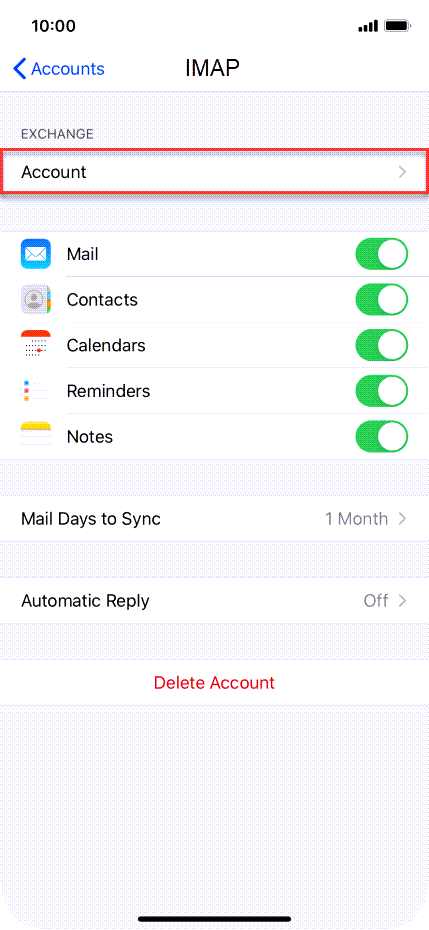
Tap Mail Accounts
Step 3. Tap the email address on the next screen

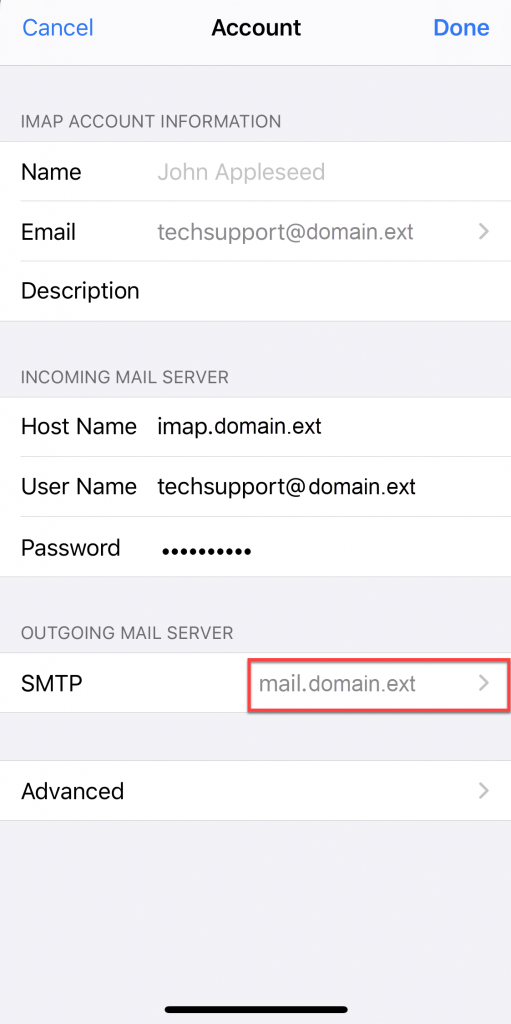
Step 4. Update your INCOMING MAIL SERVER password:
- If you are updating your password, in the Password field enter: Your NEW email password.
- If you are updating/verifying server settings- verify they are as follows
- Imcoming Mail Server Host Name- mail.benlomand.net
- Username is your FULL email address
- Password is your email password
Step 5. Update your OUTGOING MAIL SERVER settings/password:
- Tap SMTP

- Tap the account listed under Primary Server
-
If you are updating your password, in the Password field enter: Your NEW email password.
- If you are updating/verifying server settings- verify they are as follows
- Imcoming Mail Server Host Name- smtp.benlomand.net
- Username is your FULL email address
- Password is your email password
- Make sure SSL is enabled
- Server Port should be 465
-
Tap Done