Using Task Lists
|
The Task List feature lets you create to-do lists and manage tasks through completion. You can add tasks to the default task list, and you can create other Task Lists to organize your to-do lists by more specific activities, such as by work or personal projects. We have included step-by-step instructions below on tackling the most common webmail Task List functions (see them listed directly to the right). Click on a description (e.g., Creating a Task) and it will allow you to jump to specific instructions within this document. Then, click the browser back button to return to the top of the page. 
How to Create a Task ListWhen you create a new task, you will select a Task folder, also referred to as Task List, for which to track the task. By default, the Tasks List gives you a list view of all your tasks in the Tasks folder. You can create different Task Lists, in addition to the default Task List, and configure the lists to synchronize with the tasks from a remote iCal To Do list. 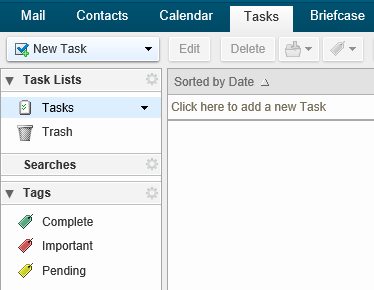
Step 4. Click OK. The Task List is displayed. 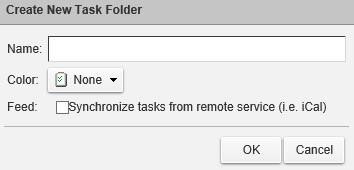
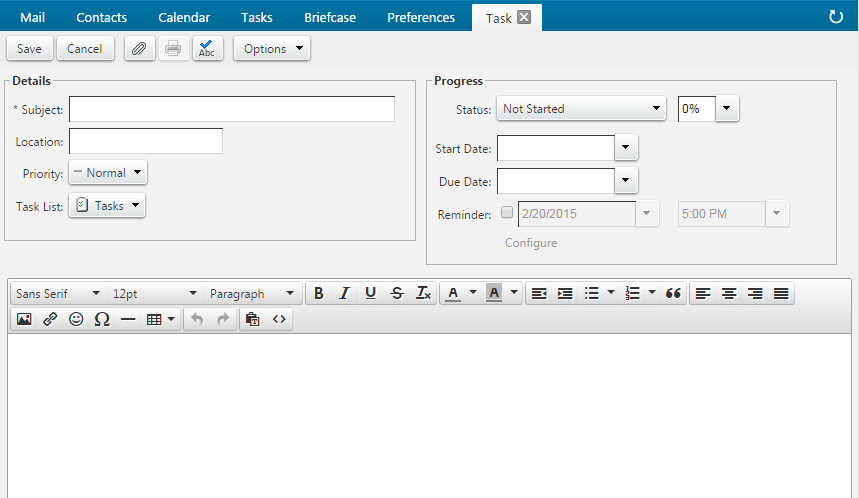
How to Create a TaskCreate a new task by entering the task name in your tasks list, or you can open a new task page and add detailed information about the task and include notes and attachments. How to Create a Task Quickly Step 1. Go to the Tasks page and in the overview pane select the Task List to which you want to add a task Step 2. In the Click here to add a new Task text box in the content pane, enter the new task name Step 3. Click Enter. This adds the task subject to your Task List, but it does not give any details. To add details, edit the task. Note: If you created a task in the wrong list, open the task and select the correct list from the Task Lists drop-down, or you can drag and drop the task on the content pane to the correct list. How to View Tasks in the Reading PaneYou can enable a reading pane to view the content of a task without opening the task. The Reading pane can display at the bottom of the content pane, on the right of the content pane, or you can turn it off so there is not reading pane. Step 1. Go to the Tasks page Step 2. Click View on the Task toolbar to select how to display the reading pane
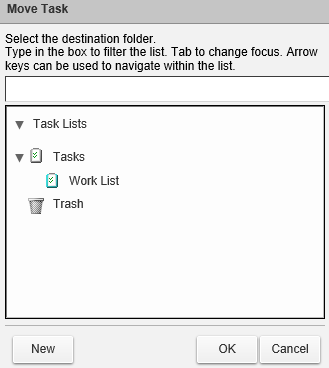
How to Change a TaskAs you progress on a task, you might want to add information, change the status and percentage completed, or mark the task complete. How to update a Task Step 1. Go to the Tasks page and select the task that you wish to edit 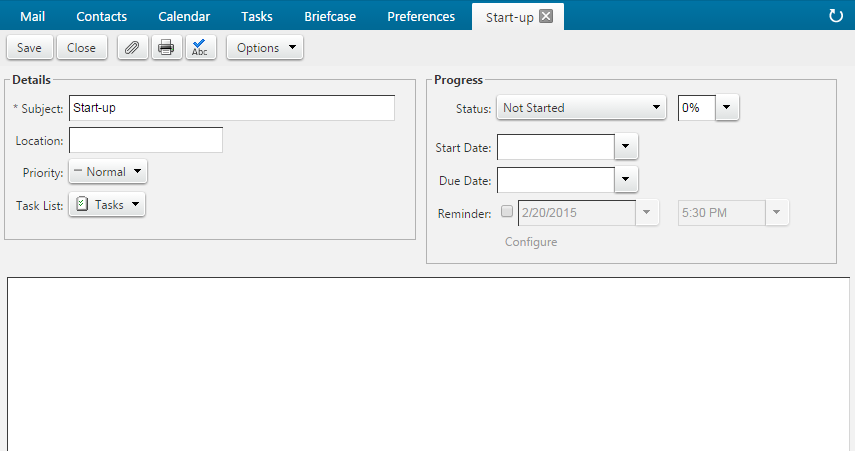 How to Mark a Task Complete Step 1. Go to the Tasks page and select one or more tasks that you want to mark as complete How to Move a Task to Another ListStep 1. Right-click a task and click Move Step 2. Select the destination list to where you want to move the task • Enter the Task List name, or use the keyboard arrows to navigate to the destination list • Click New to create a new Task List Step 3. Click OK
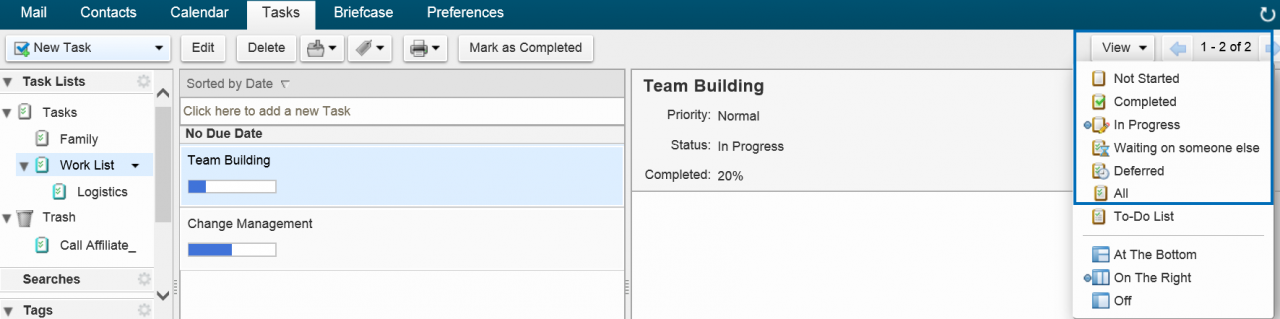
How to Sort Tasks within a Task ListYou can sort a task list to quickly see tasks by status. Step 1. Go to the Tasks page Step 2. In the overview pane, select the Task List you wish to sort Step 3. In the content pane, the default sort option is Sorted by Date. To change the sort option, right click over Sorted by Date and select your preference in the drop list. Alternative sort options include: Subject, Date, Priority, Status, % Complete, Attachment and Tag.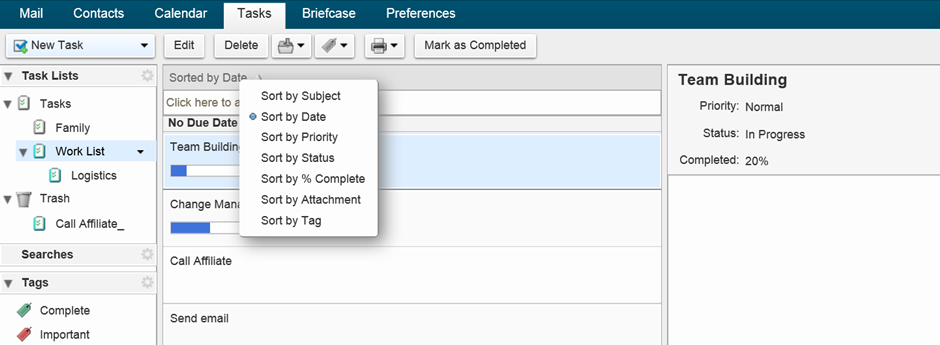
How to Filter Tasks by StatusYou can filter tasks in a Task List to quickly View tasks by status. In the View drop-down menu on the toolbar, select which type of tasks you wish to view. How to Delete a Task or Task ListDelete a Task Step 1. Go to the Tasks page Step 2. In the overview pane, select the task list that contains the tasks you want to delete Step 3. In the content pane, select the task(s) to delete. You can select multiple tasks by selecting the checkbox next to the task. Step 4. Click Delete in the toolbar. You can immediately undo this action by clicking the Undo link that appears at the top of the page and the task is moved back to its original location. Delete a Task List - When deleting a Task List, you can only delete Task Lists that you have created. Step 1. Go to the Tasks page Step 2. In the overview pane, select the task list you want to delete Step 3. In the drop-down menu, click Delete. You can immediately undo this action by clicking the Undo link that appears at the top of the page and the Task List is moved back to its original location.How to Print a Task or Task ListYou can print all the tasks in your list or you can select specific tasks to print. Step 2. In the overview pane, select the task or Task List that you want to print Step 3. In the content pane, select the Task List or tasks to print Step 4. On the Task toolbar, click Print and select whether to Print selected task(s) or to Print Task FolderStep 5. In the Print window, click Print 
How to Import a Task ListYou can import Task Lists that are saved to a .tgz file. Step 2. In Import > File, click Browse to locate the task list .tgz file to import Step 3. For the Destination, click All folders and select the task list that the tasks will be imported into or create a new task list Step 4. Click Import. Depending on the size of the .tgz file, the import might take a few minutes.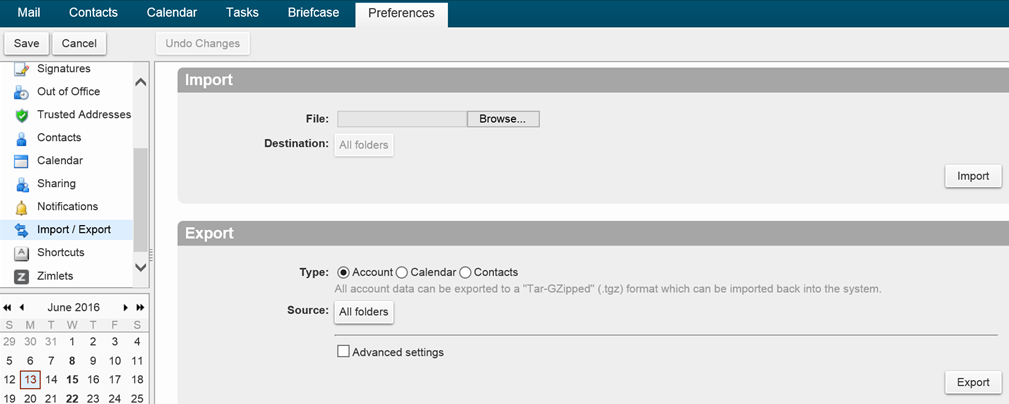 How to Export a Task ListA Task List is exported and saved in a tgz file format. Step 1. Go to Preferences > Import/Export Step 2. In Export > Type, click Accounts Step 3. Select the Source and check the Advanced Settings box Step 7. Check Save to disk Step 8. Click OK  |
|